A Basic Guide to LEDs
Contains excerpts from my booklet "Beginners Guide to LEDs"
LEDs - What are they?
LED stands for Light Emitting Diode. The diode glows when voltage is applied. If there's not enough voltage it won't light.

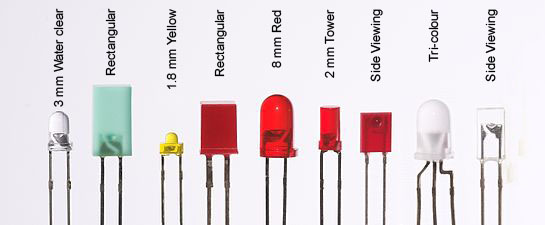
LEDs come in many shapes and sizes with bigger ones tending to be more powerful and brighter. Some have a very small field of view (so the light is like a spotlight) while others have a wider field of view and different shapes allow them to be used for a multitude of uses.
Different colours are made by including a different chemical in the diode, although some LEDs also have a coloured housing. I generally use water clear LEDs which have a clear housing and are high brightness producing the most light for the size.
There's an LED for every eventuality (well, almost!). From pencil point sized nano chip LEDs to 10mm LEDs there's a shape and size suitable for every project from lighting eyes in model soldiers to tanks, vehicle headlights and dolls houses.
Why should you use them?
- Can be run off a battery or 12v mains DC transformer (with suitable resistors)
- Several LEDs can be powered by a single battery
- Don’t get hot so are very safe to use in models
- Very bright for their size with a wide range of colours available
- Last thousands of hours (estimated at 50,000 - 100,000 hours) - a lifetime!
- Come in a range of effects including solid, flashing and flickering.

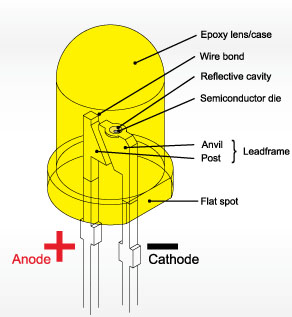
The light is produced by the semiconductor die, which is a very tiny component, with the rest being a casing or lens to project and direct the light.
LEDs might look complicated but all you need to know is that there is a positive leg and a negative leg and the positive leg is always the longest.
As long as you connect the positive leg to the positive side of the battery or power supply, you will be fine and it’s easy to test. If the LED lights up you know the wires are the right way round. If it doesn’t, switch them over.
Resistors - Why do we need them?

In very simplistic terms, if you think about it like a stream, the current is the flowing stream, electrons are the fish in the stream and when it's not moving much nothing happens and the fish group together. When voltage is applied the current pushes the fish along. When there's a narrowing of the stream the fish have to thin out and go through in small numbers. This restricts the movement and controls the flow of the fish. This is what a resistor does.
The resistor stops the LED from being supplied with too much current. The bigger the battery or power supply, the bigger the resistor needs to be to stop the LED being fried.
LED's need about 1.8v for red and yellow, 2v for green and orange and 3v for white and blue to light up.
You don't need to know any of this to use the LEDs I make though because I make them up for you with the correct resistor for the type and colour of the LED, but it's good to have a basic understanding of how it all works.
Simple connections

It's easy to connect up a simple circuit for your project
Step 1: Insert the battery into the holder.
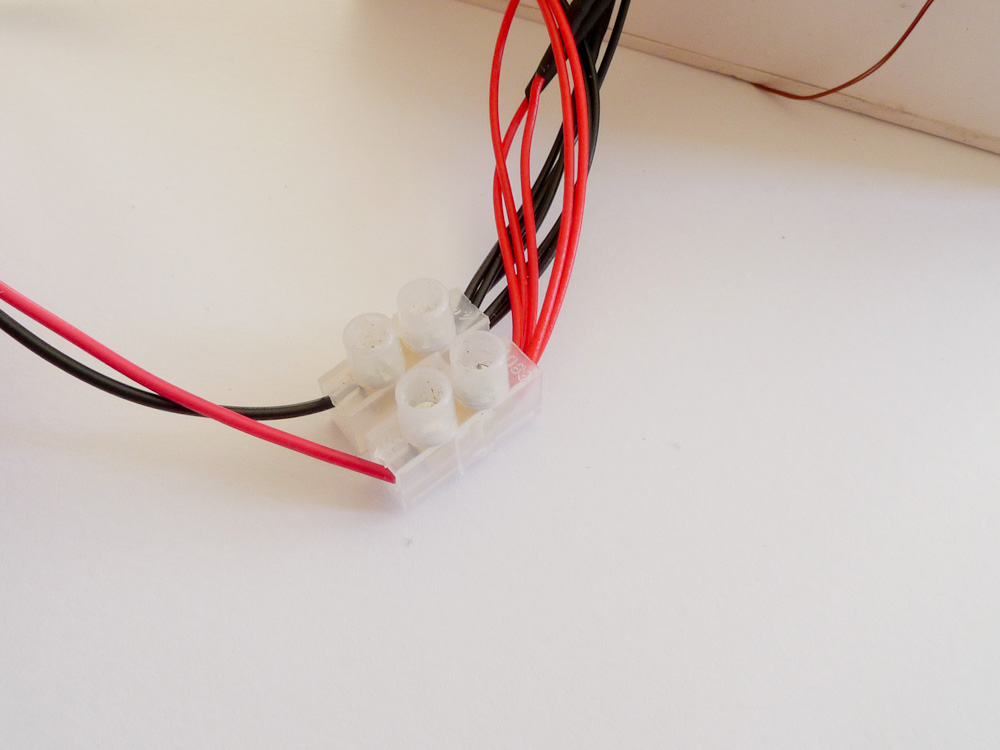
Step 2: Unscrew the little screws enough so that you can insert the wire underneath. Insert the red and black battery wires in adjacent holes on one side and tighten the screws until secure.
Step 3: Do the same for the LED wires inserting the red wire opposite the red battery wire and the black wire opposite the black battery wire.
If you have multiple LEDs you can twist the wires together, then insert under the screw and tighten to secure.
Learn More....
If you have found this useful you may wish to learn more by purchasing my "Beginners Guide to LEDs" booklet.
