Tutorial - Lighting a Warhammer 40k Rhino Tank
Posted by Small Scale Lights on 10th Aug 2022
There’s something undoubtedly cool about adding working lights to a wargaming model, adding that little bit of extra realism to really bring the kit to life. For this reason, we are pleased to bring you a complete guide to lighting the interior and exterior of wargaming vehicles. This tutorial covers installing LEDs and fibre optics into a 40k Rhino tank but it is also suitable for other tanks including Predators and Land Raiders.
Warhammer Tank Lighting Kit with Fibre Optics
Step 1:
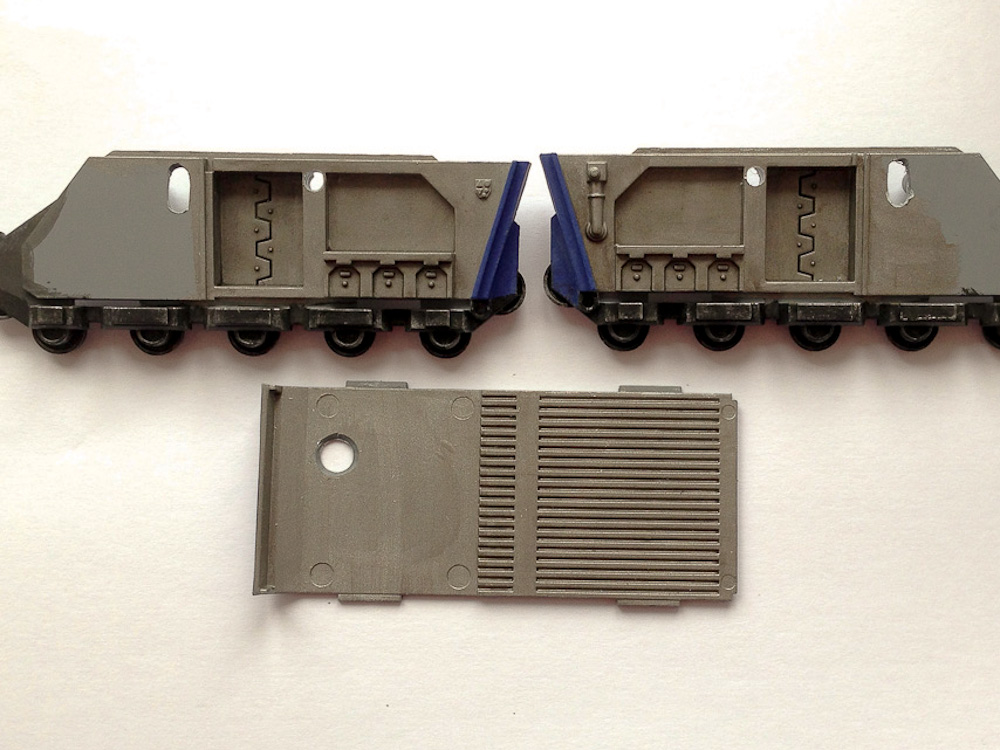
The first step is to decide where to drill the holes you need for the LEDs and wiring. Positions can be changed if desired but the interior positions work very well for hiding the wiring. Drill the holes no more than 3mm dia, starting with a small pilot hole and working upwards. Use a sharp scalpel to cut out the rest.
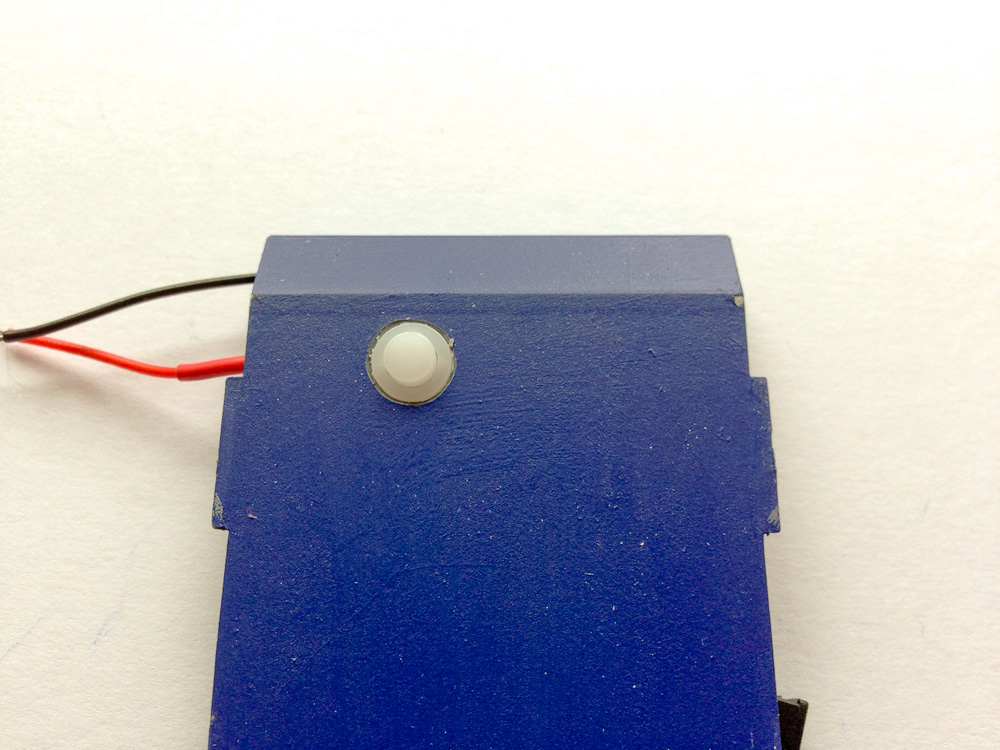
The button hole in the floor panel is 6mm approx. See Step 3.
The headlights need to be drilled out of the separate moulding before gluing on and then larger holes cut in the panel behind to fit the LED.

Step 2:
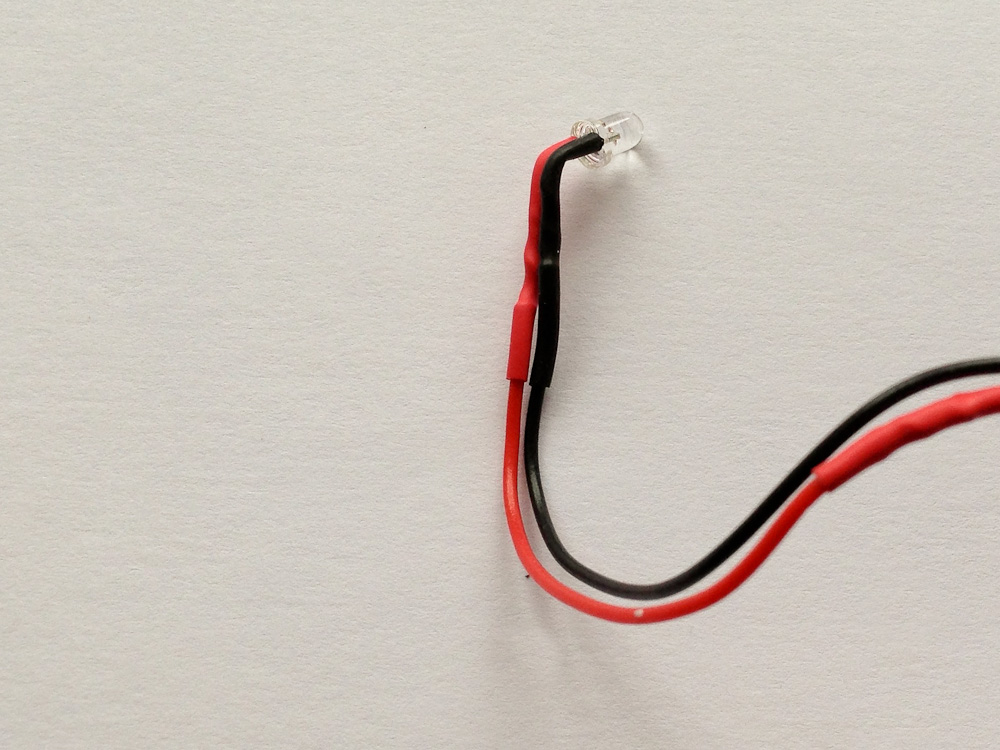
Bend the 3mm LED carefully as shown, holding the LED just behind the bulb with tweezers and bending the legs gently down. Check the fit on the interior panel then fix them in this position as it’s shown below using hot melt glue. This creates neat wiring that won’t be visible once the tank is assembled and won’t impact on the tank fitting together
Step 3:
Drill the hole in the base for the switch. It should be around a 6mm hole. The picture shows how the fitted switch should look. The button fits through entirely and the larger base snaps into the hole. Check the switch can be pressed properly.
Step 4:
To neaten the hole for the interior lighting and make it look like part of the tank you can use a moulding, self hardening putty such as Green Stuff / Milliput. Mix up a small piece as per the instructions and roll out a very thin snake. Make as thin as possible. You don’t need very much. Then wrap it around the LED bulb and shape it to look like a mounting plate. I used a coffee stirrer.

Step 5:
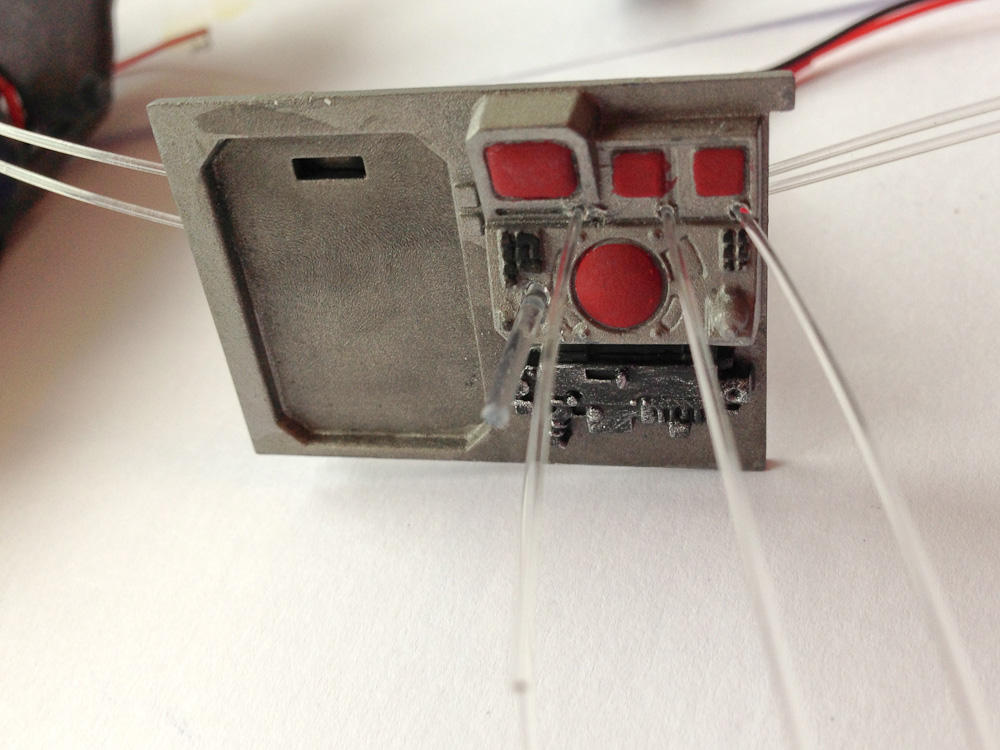
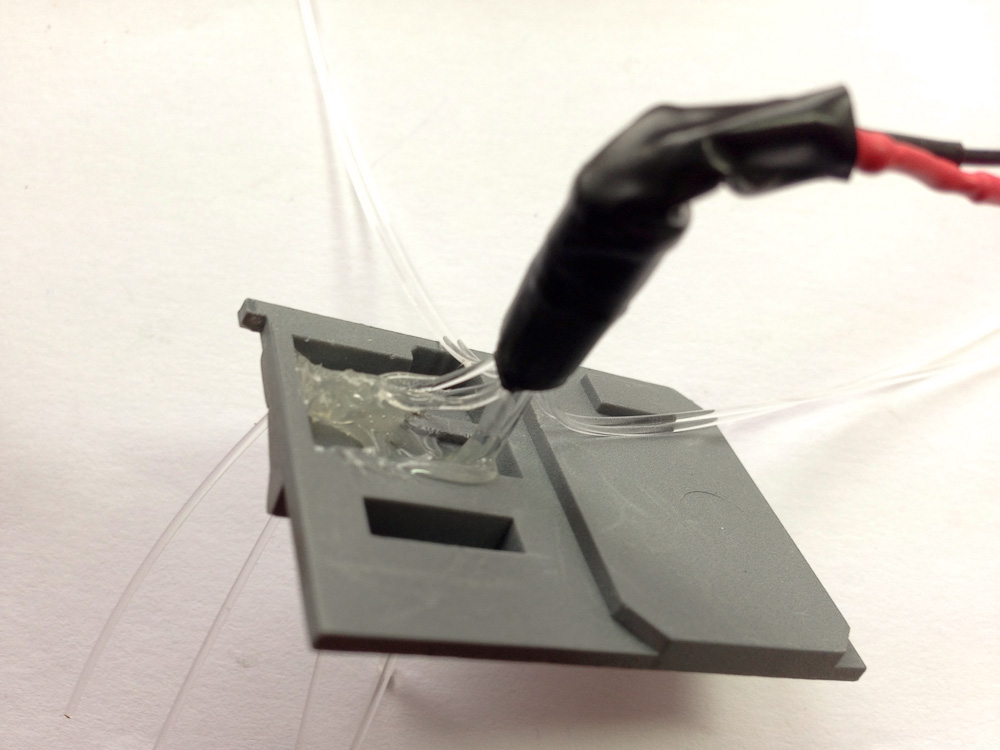
For the computer panel inside, drill holes where you would like lights. Drilling from the front is neater. Make a pilot hole first. Take the LED with fibre optic strands and fit these carefully through the holes in the computer console (or where you’ve decided to put them).The fibre is fairly flexible because it is thin but care needs to be taken to feel for resistance and not push it too far or it will snap. Get it as close to the back of the panel as possible. (see photo below) Once the strands are fitted in place use hot melt glue on the back of the panel to hold them in place.
Once fixed and the panel is painted you can then trim the fibre optics flush with the panel.
Do not use superglue with fibre optics as it makes it brittle and it will snap.
Step 6:
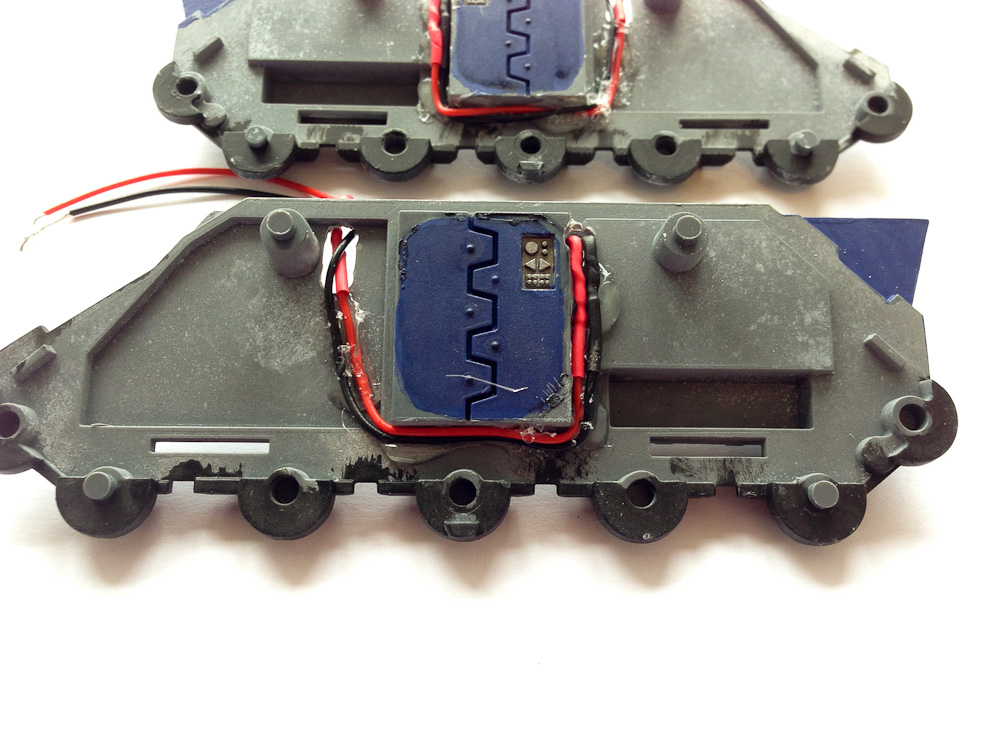
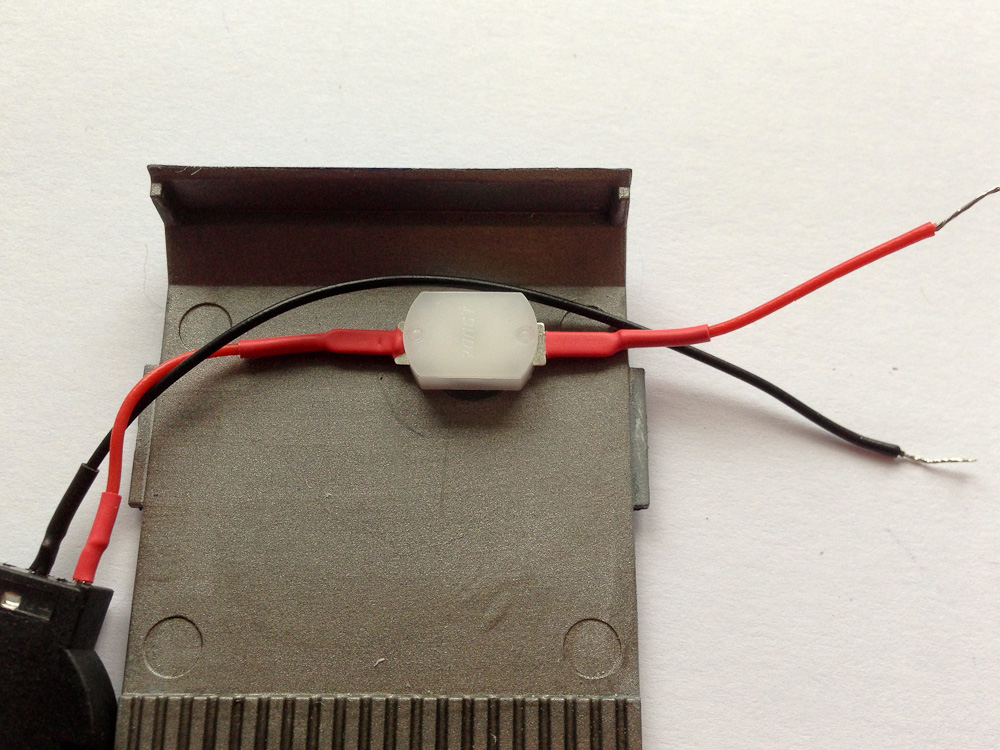
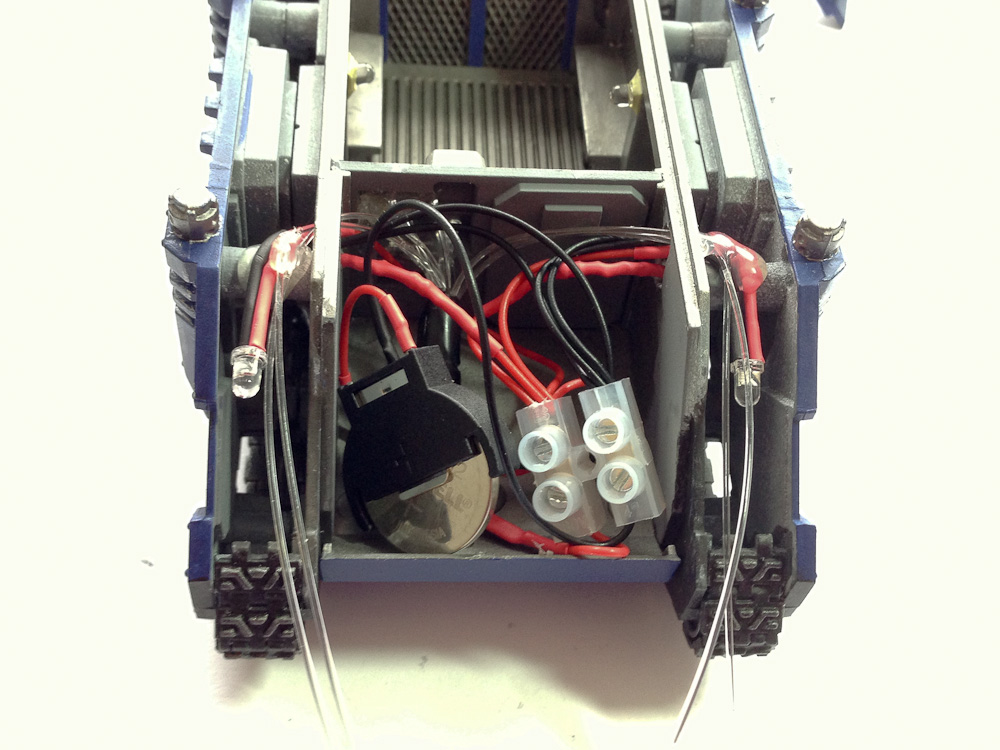
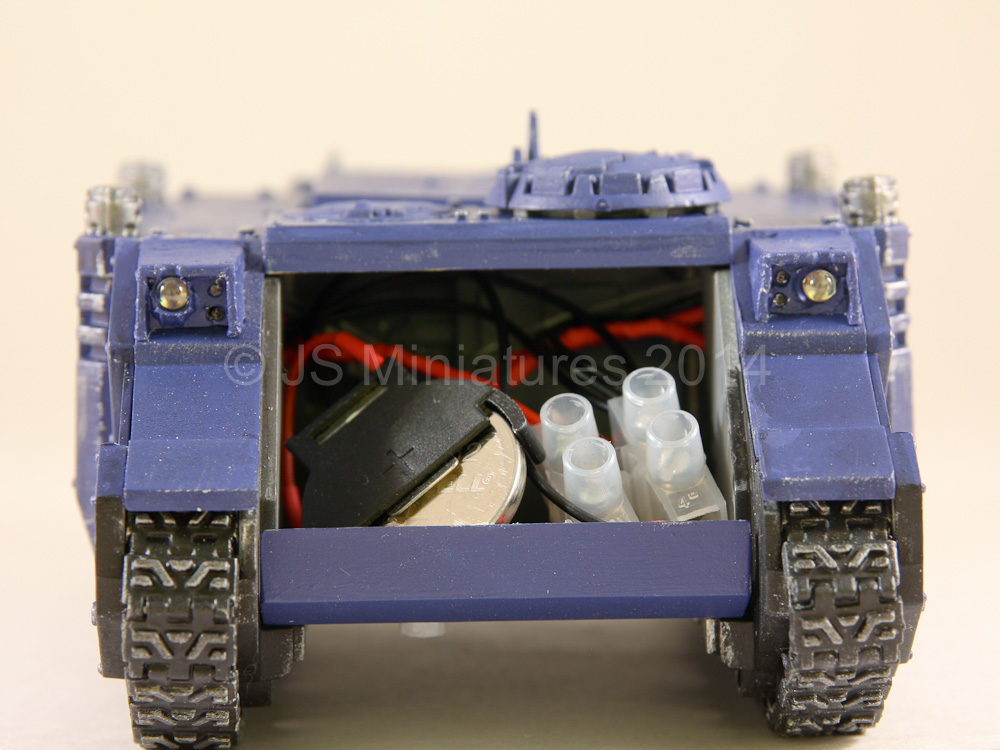
Twist the LED wires together – all the red wires and then all the black wires as shown and fit into the connector block. The battery wires go opposite the LED wires as shown. This can be fiddly but it’s best to twist the wires together as tightly as possible, adjust the screw to roughly the right height, place the wires in the hole and then tighten the screw down to secure. Glue the switch in place once the wires are all connected with hot melt glue.
The LED and fibre optics are then fed into the holes for the headlights and the panels can be glued in place.
Trim the fibre optics once painting is finished. Blue tack can be used to cover LED bulbs while painting.
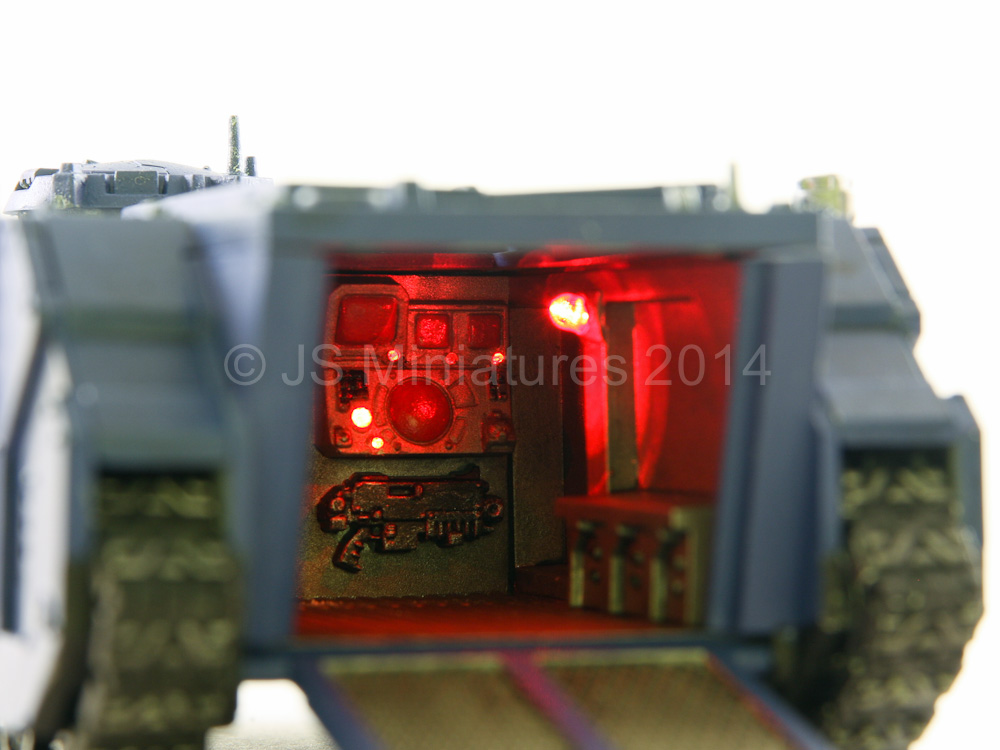
The finished tank interior with red night vision lighting.
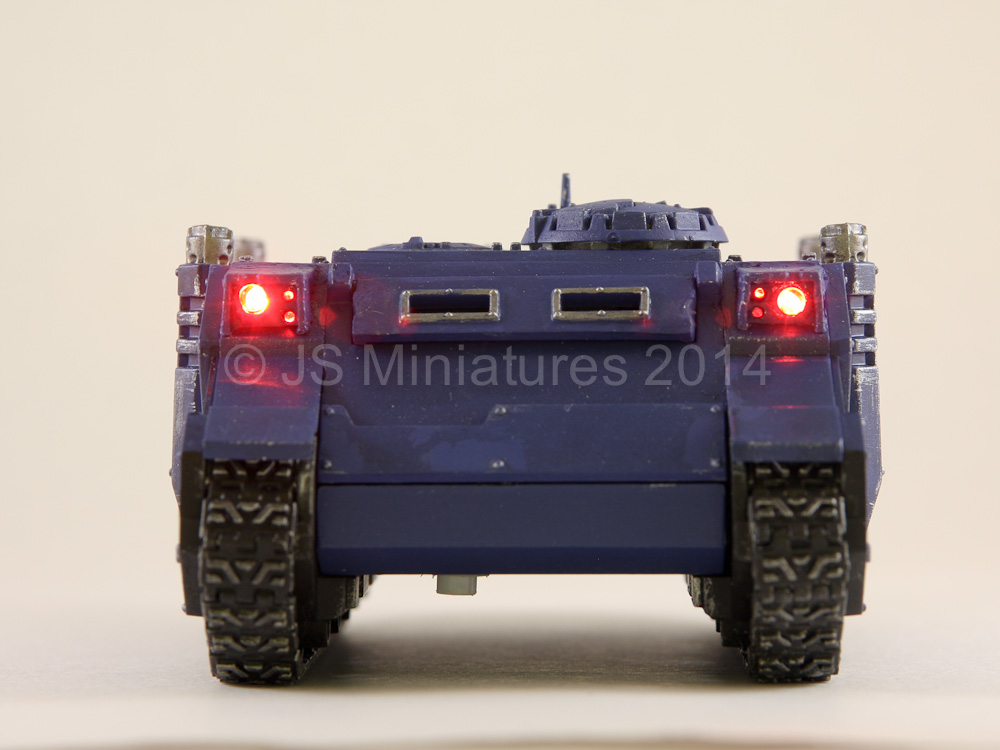
The finished tank headlights with additional fibre optic spots. The on/off button is visible underneath. This can be painted to match the tank if desired.